TTP Installation Guide Example
0. Contents
1. Prerequisites
1. Server requirements
- Microsoft Windows Server 2008+
- Microsoft SQL Server 2008
- Microsoft SQL Server Management Studio
- IIS7+
2. CMS requirements
- Windows OS (XP,Vista,7 or 8)
- .NET Framework 3.5sp1+
- Windows Media Player installed
- 4GB system memory (minimum recommended)
- 256MB dedicated graphics memory (minimum recommended)
- Processor performance will improve item creation times
3. Kiosk requirements
- Windows OS (XP,Vista,7 or 8)
- .NET Framework 3.0+
- Windows Media Player installed
- 4GB system memory (minimum recommended)
- 256MB dedicated graphics memory (minimum recommended)
4. Multi touch requirements in addition to kiosk requirements above
- Multi touch enabled monitor
- .NET Framework 4.0+
2. Download (Right click, "Save Target/Link As...")
- This is an example guide with no files to download
3. Install guide key
- [TTP database name] = "[ANYTHING]" e.g. TTPDB_[organisation]_[version key]
- [TTP username] = "[ANYTHING]"
- [TTP password] = "[ANYTHING]"
- [TTP virtual/application directory] = [ANYTHING] e.g. ttp_[organisation]_[version key]
- [TTP virtual/application directory secure] = [ANYTHING] e.g. ttp_[organisation]_[version key]_secure
- [Accessible website virtual/application directory] = [ANYTHING] e.g. accessible
4. Install guide
This guide specifically details instructions for Windows Server 2008 R2, IIS 7 and SQL SERVER 2008. If you require information regarding any different versions, please contact us.
Please make all text edits to files in a simple text editor (i.e. Notepad) to avoid extraneous characters and breaking code files.
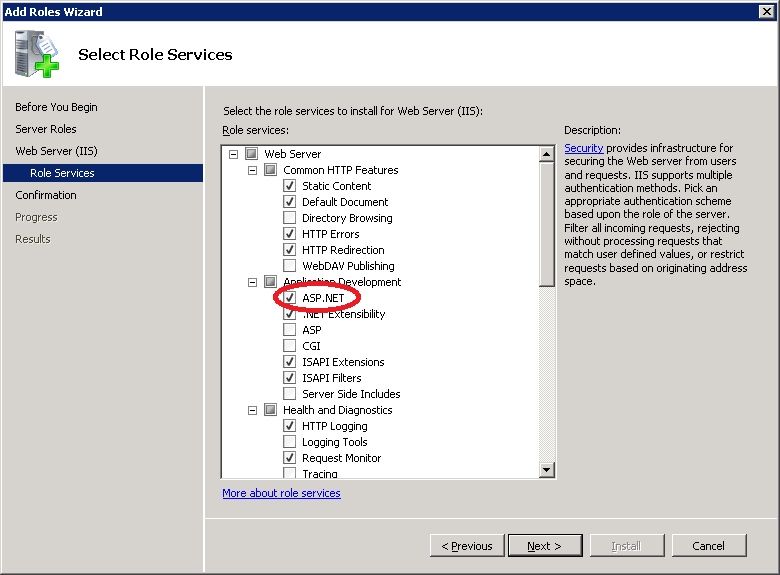
1. Install IIS
- Install IIS via the Server Manager > Features (http://www.iis.net/learn/install/installing-iis-7/installing-iis-7-and-above-on-windows-server-2008-or-windows-server-2008-r2)
- Ensure ASP.NET is ticked in the "Application Developerment" section.
2. Install .NET Framework
- Minimum version required is 3.5sp1 http://www.microsoft.com/net/download
3. Install SQL Server
- Install SQL Server (http://msdn.microsoft.com/en-us/library/ms143219(v=sql.105).aspx)
- Ensure Full-Text Search, Management Tools and Mixed Mode (Sql Server Authentication) are enabled
4. Unpack files
Toolkit content:
- [TTP database name][.bak] DB file
- [TTP virtual/application directory] folder
- Folder named "ttp" is the HTML5 website files
- Folder name containing "ACCESS" is the accessible website files
- Folder name containing "CMS" is the CMS application
Example file management on server:
- C:\ASPSITES\[TTP virtual/application directory]
- C:\ASPSITES\AccessibleWebsites\[Accessible website virtual/application directory]
- C:\inetpub\wwwroot\"ttp" folder
The CMS folder can be launched from your desired PC. It will not run from the "Program Files" folder so do not put it there.
[back to install guide] [back to top]5. Restore DB
- Create a folder in Windows Explorer for your DB in a suitable location
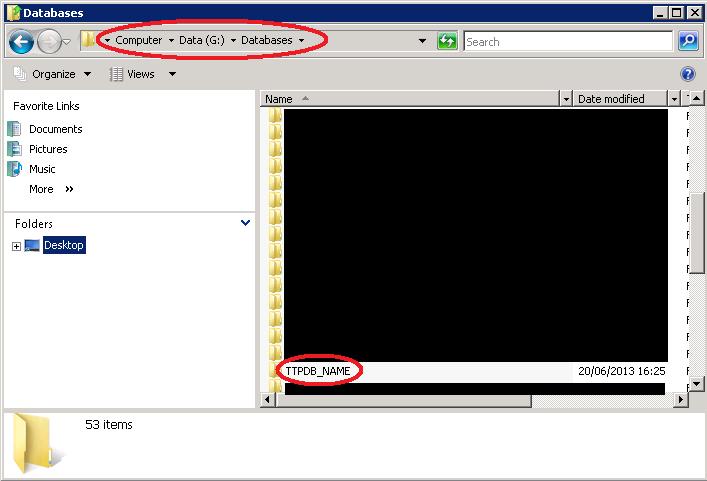
- In Microsoft SQL Server Mangement Studio create a new DB
- Right click Databases > New Database
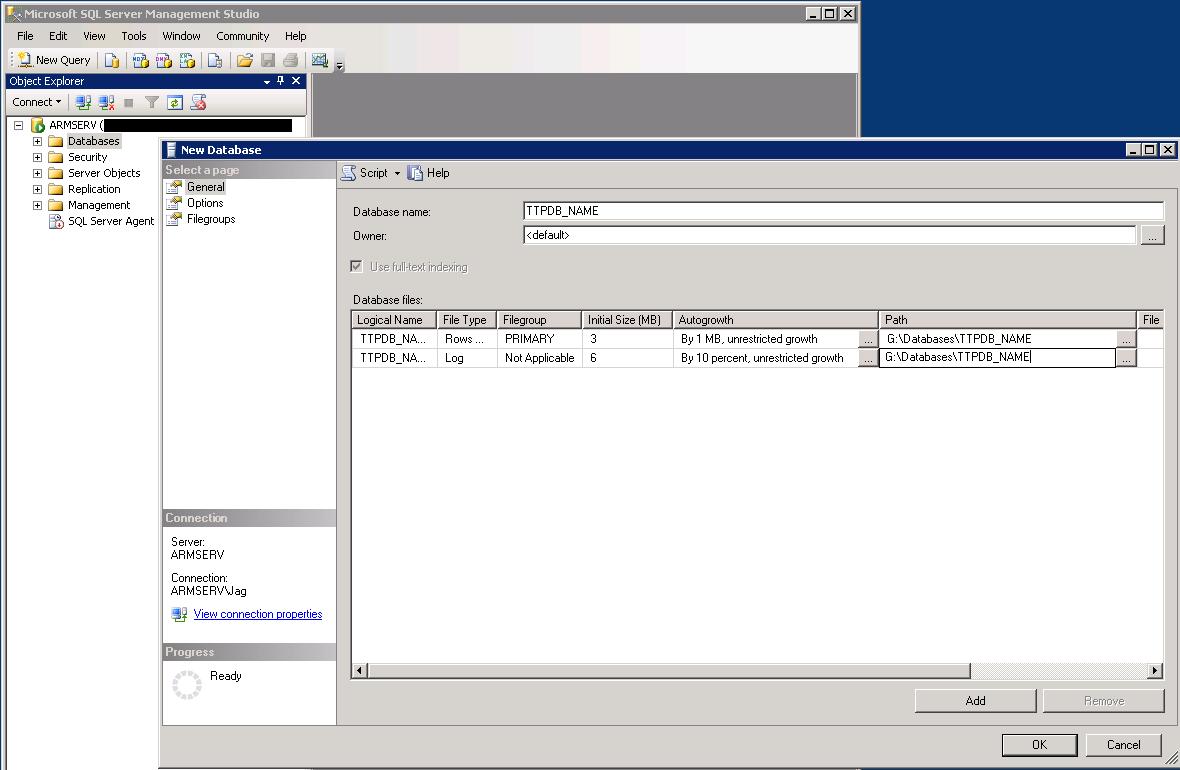
- Set the path to the directory you created in step 1.
- Right click the database you just created in the Databases tree > Tasks > Restore > Database..
- Ensure you are restoring to the correct database name. Select "From device" and browse to the .bak file supplied in the toolkit files
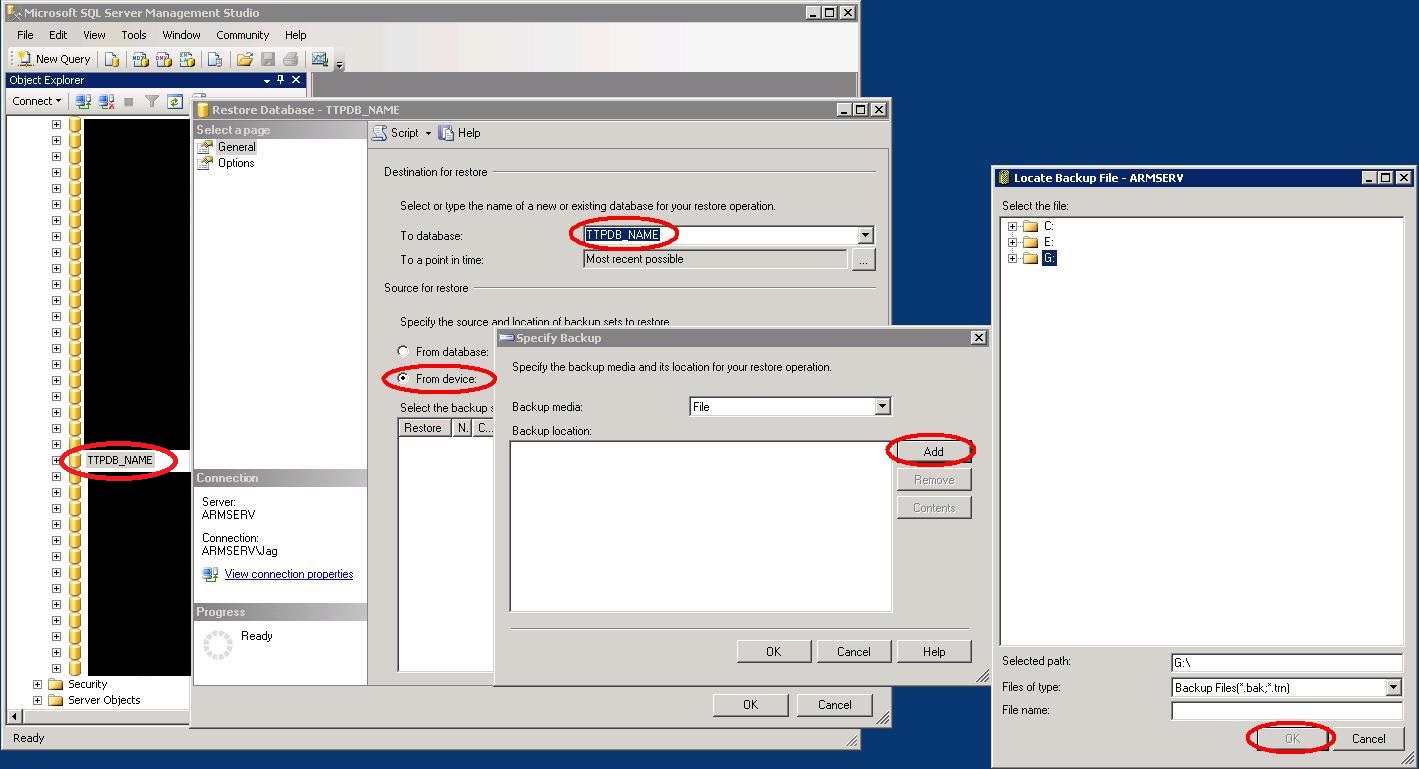
- Tick the check box for the available backup set, then go to the "Options" page
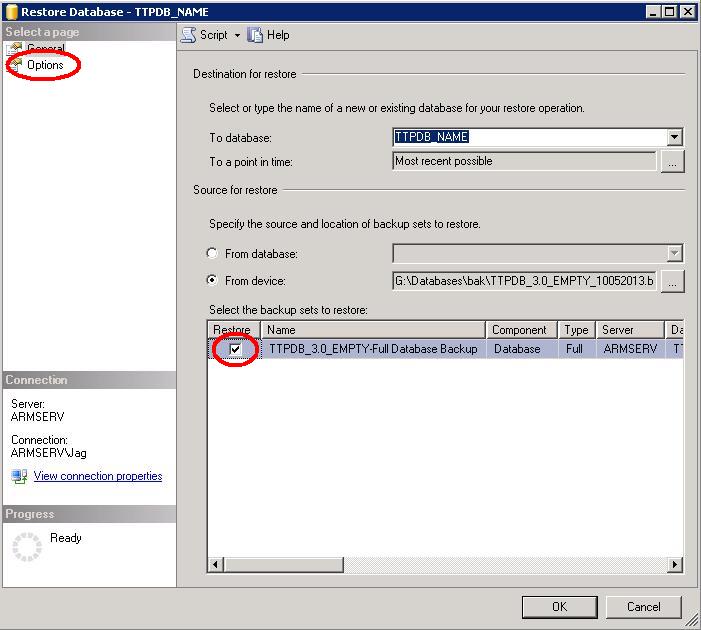
- Set the "Restore As" paths to the DB directory and file names you created for the new database
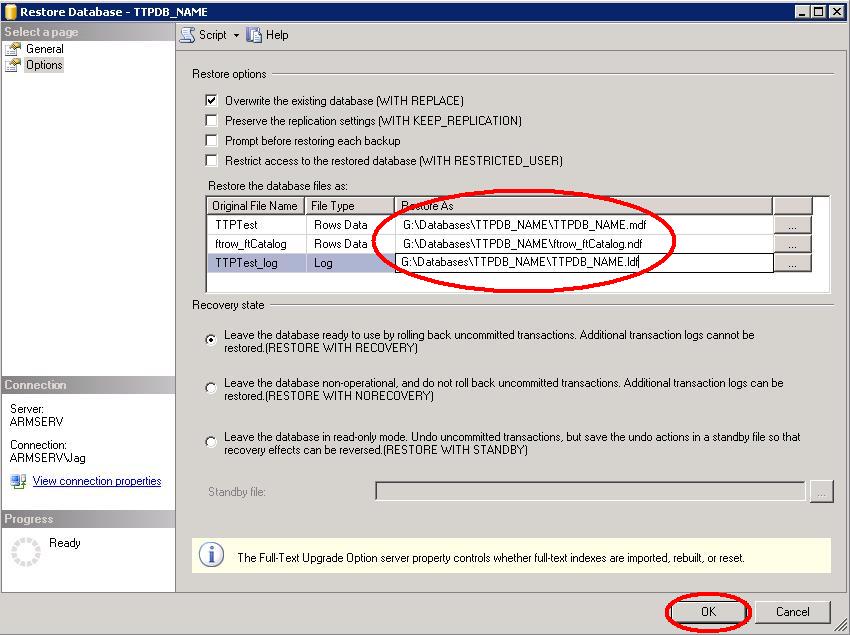
- Click ok and your database restore will be complete

6. Create user for DB
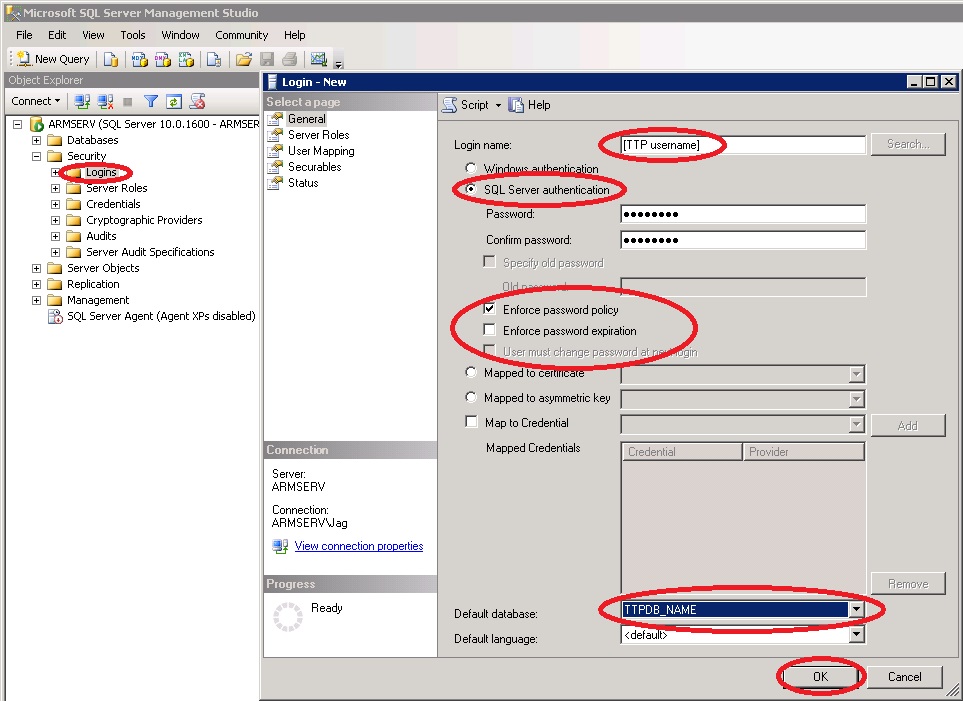
- Right click New Login.. from the Security > Logins tree in Management Studio
- Create a new login name with "SQL Server authentication", choose your desired password settings and you can assign the default database if desired
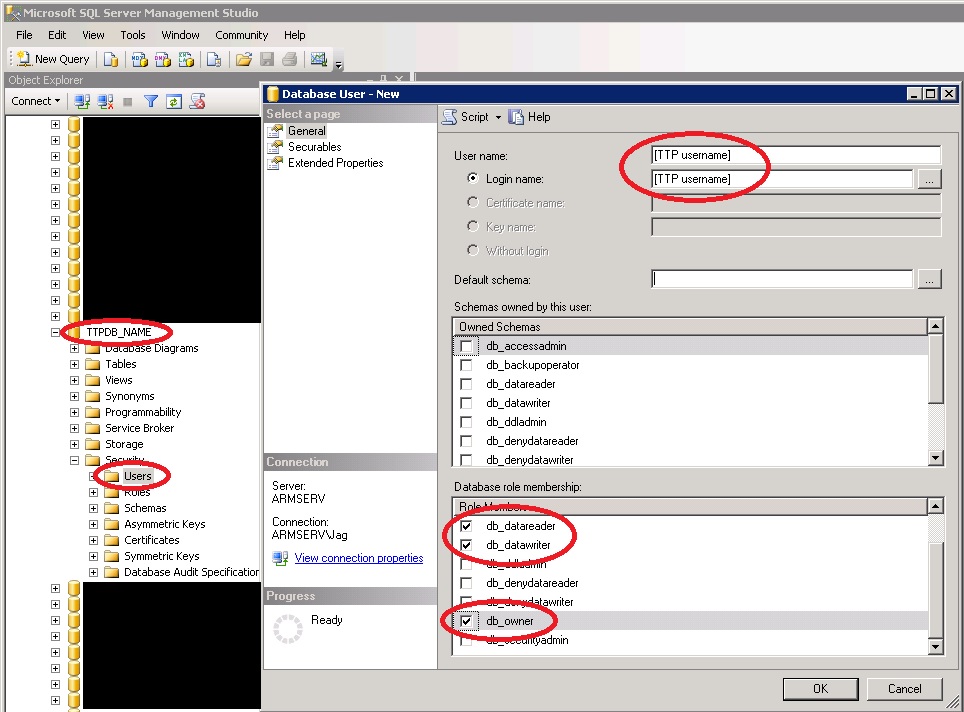
- In Management Studio add the new login name to your database. [TTP database name] > Security > Users
- Right click New User...
- Enter the [TTP username] for User name and login name. Tick "db_datareader", "db_datawriter" and "db_owner" in the Datebase role memebership section
7. Configure IIS and applications
- Decide on your location within IIS for TTP. i.e. If it will be configured as its own "Web Site". URL paths are important in TTP so a change to the domain name will stop TTP from working once setup.
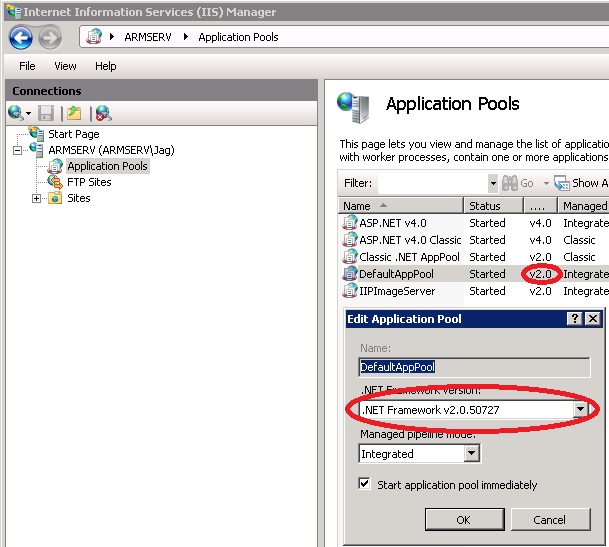
- Ensure the "Application Pool" for your TTP "Web Site" uses .NET Framework v2.0
- In IIS create 3 new "Applications" for your TTP website.
- One for [TTP virtual/application directory] which is a prepared folder in the toolkit download
- One for [TTP virtual/application directory secure] which is the "secure" folder within [TTP virtual/application directory]
- One for [Accessible website virtual/application directory] which is your accessible website folder
Below is an example of creating an "Application". Right click your website > "Add Application..."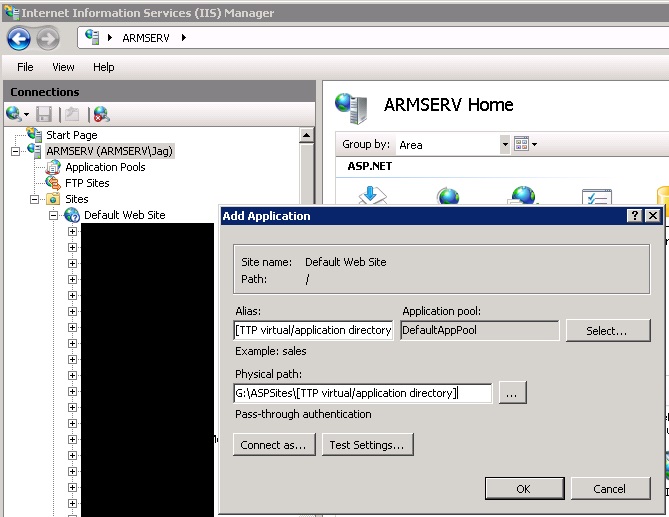
- Browse to each of the Application directories in Windows Explorer to find a web.config file in each directory
- Edit the "connectionString" in each of these files to reflect your "Data Source" (SQL Server name), "Initial Catalog" (DB name), "User ID" (DB login name created for TTP) and "Password" (DB password for login name).
e.g. <add name="TTPDB" connectionString="Data Source=["Server\SQL SERVER NAME" OR "SQL SERVER NAME"];Initial Catalog=[TTP database name];User ID=[TTP username];Password=[TTP password]" providerName="System.Data.SqlClient"/> - In the web.config for the accessible folder also edit the value in "appSettings" for key "TTPServer.ttpwebservice" with the url path to your ttpwebservice.asmx file found in [TTP virtual/application directory]
e.g. <add key="TTPServer.ttpwebservice" value="http://[domain]/[TTP virtual/application directory]/ttpwebservice.asmx"/> - Add some mime types to your TTP website
- Extention: ".ttp" Type: "application/octet-stream"
- Extention: ".wdp" Type: "image/vnd.ms-photo"
- Extention: ".mp4" Type: "video/mp4"
- Extention: ".oga" Type: "audio/ogg"
- Extention: ".ogv" Type: "video/ogg"
8. Test DB and IIS setup
- Navigate to ttpwebservice.asmx in [TTP virtual/application directory] in a web browser on your server. E.g. http://[domain]/[TTP virtual/application directory]/ttpwebservice.asmx
- You will see a list of web services.
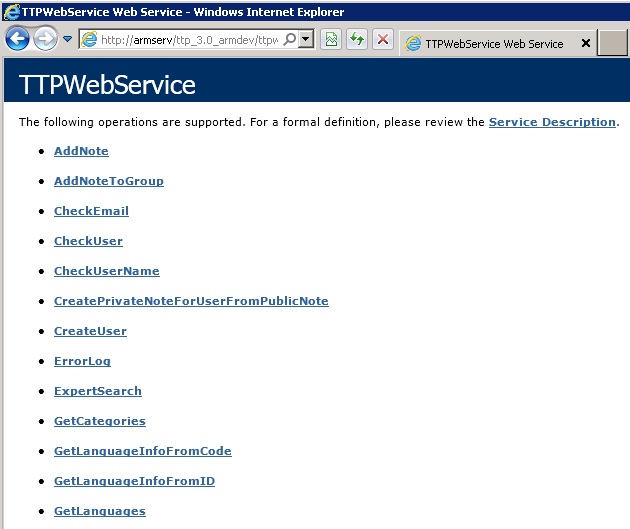
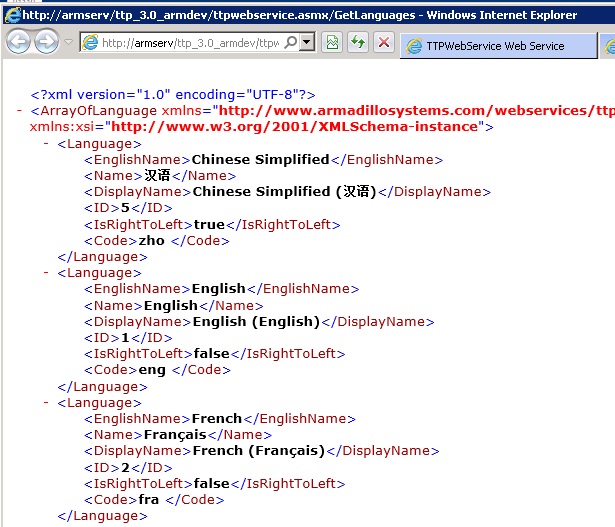
- Click "GetLanguages" and then the "Invoke" button to test.
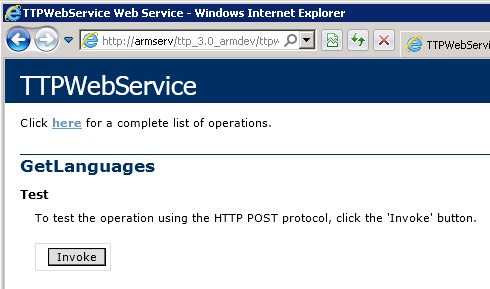
- If setup is correct you will see some XML about language options and http://[domain]/[TTP virtual/application directory]/ttpwebservice.asmx is setup, if not an error should highlight the problem
- Navigate to ttpwebservicessecure.asmx in [TTP virtual/application directory secure] in a web browser on your server. E.g. http://[domain]/[TTP virtual/application directory secure]/ttpwebservicessecure.asmx
- You will see a list of web services.

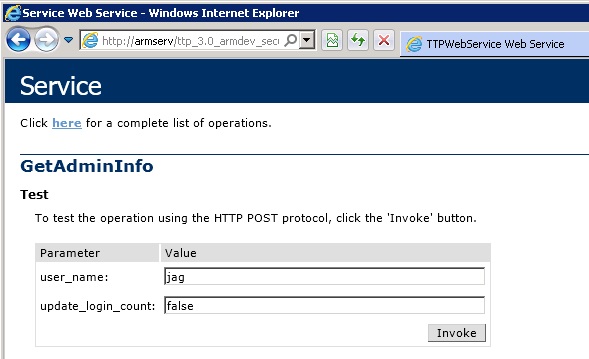
- Click "GetAdminInfo" and enter your CMS username in the "user_name" field and "false" in the "update_login_count" field. You can find your username in the Admins table of the database. Click the Invoke button to test.
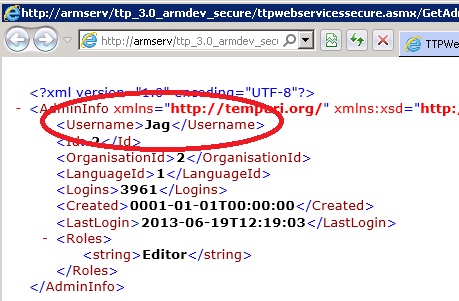
- If setup is correct you will see some useful XML with your username displayed and http://[domain]/[TTP virtual/application directory secure]/ttpwebservicessecure.asmx is setup, if not an error should highlight the problem
9. File transfer between CMS and Server
- You can choose one of two methods to transfer files between the CMS application and your Server for the online content.
- FTP
- Create an FTP account with Read and Write privileges to a home directory of: [TTP virtual/application directory]/bookdata/
- File transfer over UNC path
- The Windows user for the CMS must have full security privliges (Modify, Read & execute, Read, Write) to the "[TTP virtual/application directory]/bookdata/" directory
- FTP
10. Configure HTML5 TTP
- Edit the file settings.js in HTML5 "ttp/js/" folder.
- Set the value for "bdPath" to "http://[domain]/[TTP virtual/application directory]/bookdata/"
- Set the value for "wsPath" to "http://[domain]/[TTP virtual/application directory]/ttpwebservice.asmx/"
- Save changes to settings.js
- Edit ttp.html in the root of the HTML5 "ttp" folder
- Searching the page will reveal two locations showing the text "Alternately you can view the <a href="">accessible version of this website</a>"
- Complete the "href" attribute of the "a" tag to link to the accessible website
e.g. "http://[domain]/[Accessible website virtual/application directory]"
11. Configure Accessible TTP
- Edit the file Helper.cs in [Accessible website virtual/application directory]/App_Code/ folder
- Set the value for "MEDIA_DIR_URI" to "http://[domain]/[TTP virtual/application directory]/bookdata/books/"
- Set the value for "MEDIA_DIR_UNC" to "[Drive letter]:\[Windows explorer path to bookdata directory]\bookdata\books\"
- Save changes to Helper.cs
12. Configure CMS
- Edit the file "TTPCMS.exe.config" in the root of the CMS folder
- Set the values for the following settings:
- TTPCMS_TTPWebReference_TTPWebService = http://[domain]/[TTP virtual/application directory]/ttpwebservice.asmx
- TTPCMS_TTPSecureWebReference_Service = http://[domain]/[TTP virtual/application directory secure]/ttpwebservicessecure.asmx
- AccessiblePath: http://[domain]/[Accessible website virtual/application directory]/spreaddetails.aspx
- MediaServer: http://[domain]/[TTP virtual/application directory]/bookdata/
- HTML5Path: http://[domain]/[web folder path to "ttp" html5 folder]/ttp.html
- For file transfer via FTP:
- FTPServer: ftp://[domain]/
- FTPUsername: [FTP user name]
- FTPPassword: [FTP password]
- OR file transfer via UNC path:
- UNCServer: \\[Server name]\[Windows explorer path to bookdata directory]\bookdata\
- If a UNC path is set that will always be used. Either the FTP or UNC settings should be left empty
- Save changes to TTPCMS.exe.config
13. Install is complete
- Open TTPCMS.exe within the root of the CMS folder
- Login with your CMS user name
- Start building your TTP library